LOAD CSV Cypher clause
If your data is in CSV format, you can import it into a running Memgraph
database from a designated CSV files using the LOAD CSV Cypher clause. The
clause reads row by row from a CSV file, binds the contents of the parsed row to
the variable you specified and populates the database if it is empty, or appends
new data to an existing dataset. Memgraph supports the Excel CSV dialect, as
it's the most common one.
LOAD CSV clause cannot be used with a Memgraph Cloud instance because at the
moment it is impossible make files accessible by Memgraph.
Clause syntax
The syntax of the LOAD CSV clause is:
LOAD CSV FROM <csv-file-path> ( WITH | NO ) HEADER [IGNORE BAD] [DELIMITER <delimiter-string>] [QUOTE <quote-string>] AS <variable-name>
<csv-file-path>is a string of the path to the CSV file. There are no restrictions on where in your filesystem the file can be located, as long as the path is valid (i.e., the file exists). If you are using Docker to run Memgraph, you will need to copy the files from your local directory into the Docker container where Memgraph can access them.( WITH | NO ) HEADERflag specifies whether the CSV file has a header, in which case it will be parsed as a map, or it doesn't have a header, in which case it will be parsed as a list.If the
WITH HEADERoption is set, the very first line in the file will be parsed as the header, and any remaining rows will be parsed as regular rows. The value bound to the row variable will be a map of the form:{ ( "header_field" : "row_value" )? ( , "header_field" : "row_value" )* }If the
NO HEADERoption is set, then each row is parsed as a list of values. The contents of the row can be accessed using the list index syntax. Note that in this mode, there are no restrictions on the number of values a row contains. This isn't recommended, as the user must manually handle the varying number of values in a row.
IGNORE BADflag specifies whether rows containing errors should be ignored or not. If it's set, the parser attempts to return the first valid row from the CSV file. If it isn't set, an exception will be thrown on the first invalid row encountered.DELIMITER <delimiter-string>option enables the user to specify the CSV delimiter character. If it isn't set, the default delimiter character,is assumed.QUOTE <quote-string>option enables the user to specify the CSV quote character. If it isn't set, the default quote character"is assumed.<variable-name>is a symbolic name representing the variable to which the contents of the parsed row will be bound to, enabling access to the row contents later in the query. The variable doesn't have to be used in any subsequent clause.
Clause specificities
When using the LOAD CSV clause please keep in mind:
The parser parses the values as strings so it's up to the user to convert the parsed row values to the appropriate type. This can be done using the built-in conversion functions such as
ToInteger,ToFloat,ToBooleanetc. Consult the documentation on the available conversion functions.The
LOAD CSVclause is not a standalone clause, which means that a valid query must contain at least one more clause, for example:MERGE (n:A) LOAD CSV FROM "file.csv" WITH HEADER AS row;In this regard, the following query will throw an exception:
LOAD CSV FROM "file.csv" WITH HEADER AS row;Because of the need to use at least two clauses, the clause that exhausts its results sooner will dictate how many times the "loop" is executed. Consider the following query:
MATCH (n)
LOAD CSV FROM "file.csv" WITH HEADER as row
SET n.p = row;
If the
MATCH (n)clause finds five nodes, and the "file.csv" has only two rows, only the first two nodes returned by theMATCH (n)will have their properties set, using the two rows from the CSV file.Similarly, if the
MATCH (n)clause finds two nodes, whereas the "file.csv" has five rows, only the two nodes returned byMATCH (n)will have their properties set with the values from the first two rows of the CSV file.The
LOAD CSVclause can be used at most once per query, so the queries like the one below wll throw an exception:LOAD CSV FROM "x.csv" WITH HEADER as x
LOAD CSV FROM "y.csv" WITH HEADER as y
CREATE (n:A {p1 : x, p2 : y});
Examples
Below, you can find two examples of how to use the LOAD CSV clause depending on the complexity of your data:
One type of nodes and relationships
Let's import a simple dataset from the people_nodes and people_relationships CSV files.
- WITH CSV header
- NO CSV header
Download the CSV files:
people_nodes.csvfile with the following content:id,name
100,Daniel
101,Alex
102,Sarah
103,Mia
104,Lucypeople_relationships.csvfile with the following content:id_from,id_to
100,101
100,102
100,103
101,103
102,104
These CSV files have a header, which means the
HEADERoption of theLOAD CSVclause needs to be set toWITH. Each row will be parsed as a map, and the fields can be accessed using the property lookup syntax (e.g.id: row.id).Check the location of the CSV file. If you are working with Docker, copy the files from your local directory into the Docker container where Memgraph can access them.
Transfer CSV files into a Docker container
1. Start your Memgraph instance using Docker.
2. Open a new terminal and find the
CONTAINER IDof the Memgraph Docker container:docker ps3. Copy a file from your current directory to the container with the command:
docker cp ./file_to_copy.csv <CONTAINER ID>:/file_to_copy.csvThe file is now inside your Docker container, and you can import it using the
LOAD CSVclause.The following query will load row by row from the CSV file, and create a new node for each row with properties based on the parsed row values:
LOAD CSV FROM "/path-to/people_nodes.csv" WITH HEADER AS row
CREATE (p:Person {id: row.id, name: row.name});
If successful, you should receive an
Empty set (0.014 sec)message.With the initial nodes in place, you can now create relationships between them by importing the
people_relationships.csvfile:LOAD CSV FROM "/path-to/people_relationships.csv" WITH HEADER AS row
MATCH (p1:Person {id: row.id_from}), (p2:Person {id: row.id_to})
CREATE (p1)-[:IS_FRIENDS_WITH]->(p2);
Download the CSV files:
people_nodes.csvfile with the following content:100,Daniel
101,Alex
102,Sarah
103,Mia
104,Lucypeople_relationships.csvfile with the following content:100,101
100,102
100,103
101,103
102,104
These CSV files don't have a header, so the
HEADERoption of theLOAD CSVneeds to be set toNO. Each row will be parsed as a list, and you can access elements by defining the position of the element in the list.Check the location of the CSV file. If you are working with Docker, copy the files from your local directory into the Docker container where Memgraph can access them.
Transfer CSV files into a Docker container
1. Start your Memgraph instance using Docker.
2. Open a new terminal and find the
CONTAINER IDof the Memgraph Docker container:docker ps3. Copy a file from your current directory to the container with the command:
docker cp ./file_to_copy.csv <CONTAINER ID>:/file_to_copy.csvThe file is now inside your Docker container, and you can import it using the
LOAD CSVclause.The following query will load row by row from the CSV file, and create a new node for each row with properties based on the parsed row values:
LOAD CSV FROM "/path-to/people_nodes.csv" NO HEADER AS row
CREATE (p:Person {id: row[0], name: row[1]});
If successful, you should receive an
Empty set (0.014 sec)message.With the initial nodes in place, you can now create relationships between them by importing the
people_relationships.csvfile::LOAD CSV FROM "/path-to/people_relationships.csv" NO HEADER AS row
MATCH (p1:Person {id: row[0]}), (p2:Person {id: row[1]})
CREATE (p1)-[:IS_FRIENDS_WITH]->(p2);
This is how the graph should look like in Memgraph after the import
MATCH p=()-[]-() RETURN p;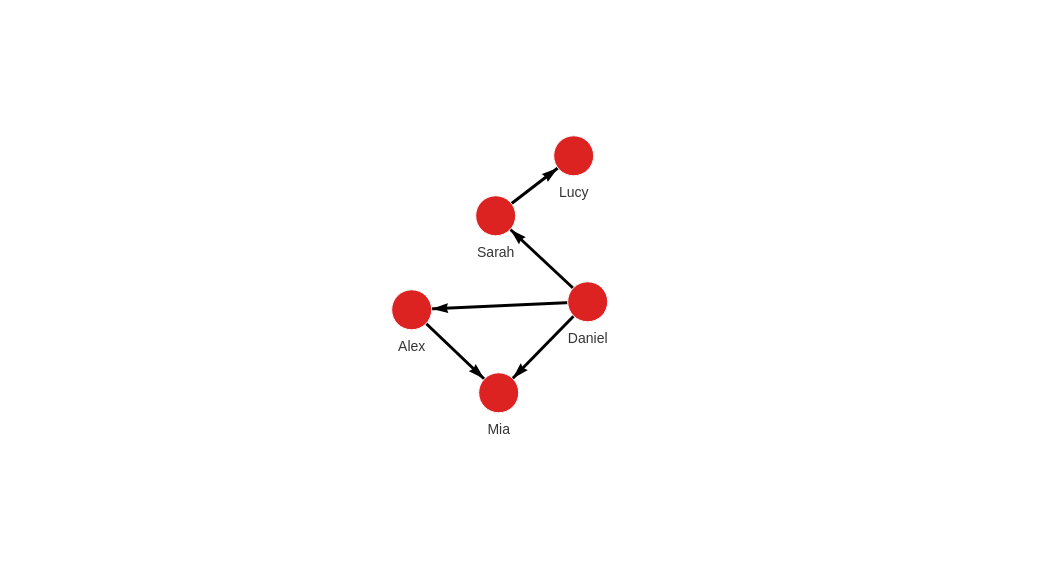
Multiple types of nodes and relationships
In the case of a more complex graph, we have to deal with multiple node and relationship types.
Let's say we want to create a graph like this:
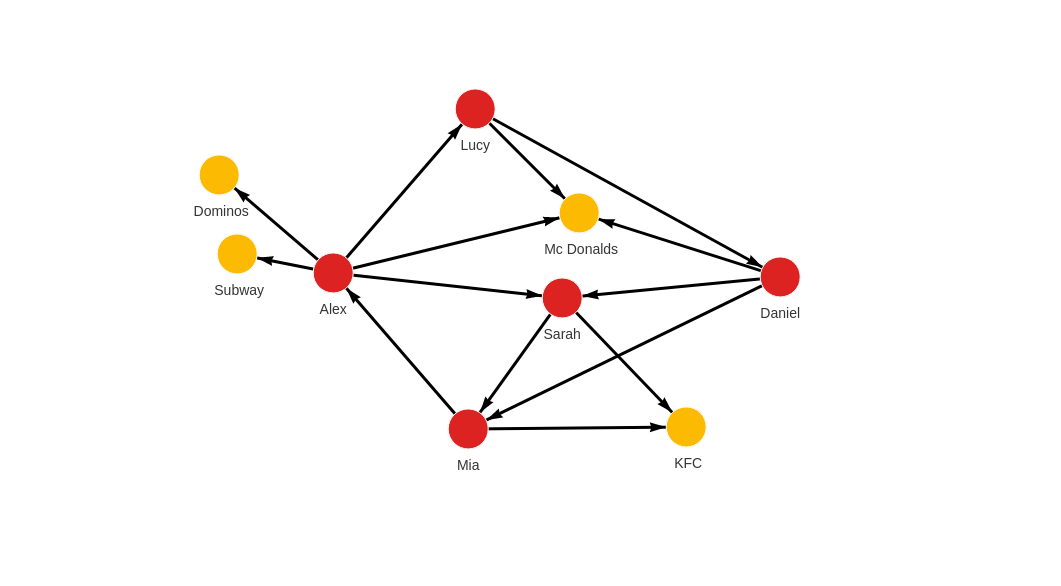
We will create that graph by using LOAD CSV clause to import four CSV files.
- 1. people_nodes.csv
- 2. people_relationships.csv
- 3. restaurants_nodes.csv
- 4. restaurants_relationships.csv
Download the
people_nodes.csvfile, content of which is:id,name,age,city
100,Daniel,30,London
101,Alex,15,Paris
102,Sarah,17,London
103,Mia,25,Zagreb
104,Lucy,21,ParisThese CSV files have a header, which means the
HEADERoption of theLOAD CSVclause needs to be set toWITH. Each row will be parsed as a map, and the fields can be accessed using the property lookup syntax (e.g.id: row.id).Check the location of the CSV file. If you are working with Docker, copy the files from your local directory into the Docker container where Memgraph can access them.
Transfer CSV files into a Docker container
1. Start your Memgraph instance using Docker.
2. Open a new terminal and find the
CONTAINER IDof the Memgraph Docker container:docker ps3. Copy a file from your current directory to the container with the command:
docker cp ./file_to_copy.csv <CONTAINER ID>:/file_to_copy.csvThe file is now inside your Docker container, and you can import it using the
LOAD CSVclause.The following query will load row by row from the file, and create a new node for each row with properties based on the parsed row values:
LOAD CSV FROM "/path-to/people_nodes.csv" WITH HEADER AS row
CREATE (n:Person {id: row.id, name: row.name, age: ToInteger(row.age), city: row.city});
This is how the graph should look like in Memgraph after the import:
MATCH (p) RETURN p;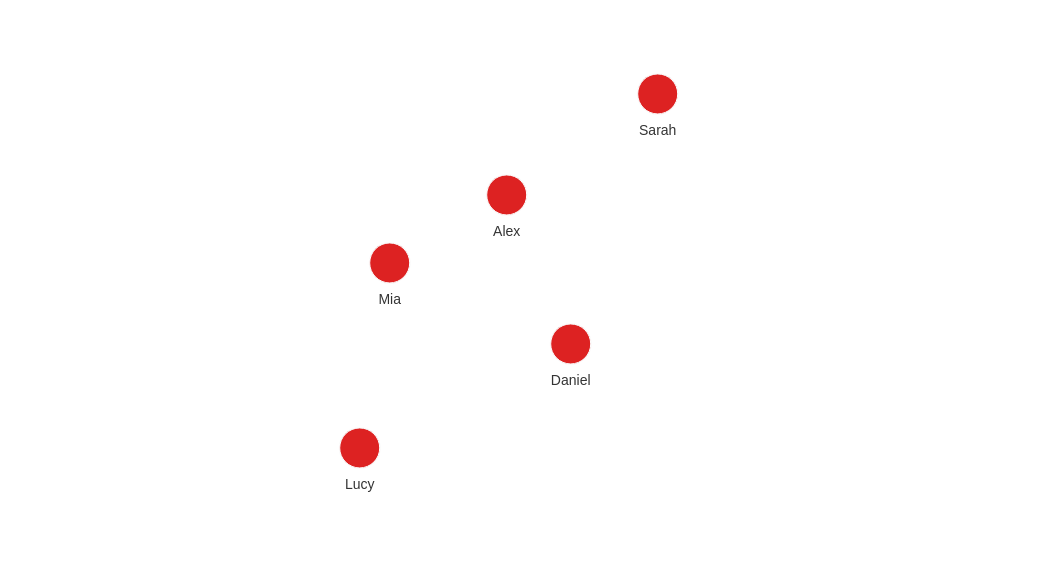
Now move on to the people_relationships.csv file.
Each person from the people_nodes.csv file is connected to at least one other
person by being friends.
Download the
people_relationships.csvfile, where each row represents one friendship and the year it started:first_person,second_person,met_in
100,102,2014
103,101,2021
102,103,2005
101,104,2005
104,100,2018
101,102,2017
100,103,2001Check the location of the CSV file. If you are working with Docker, copy the files from your local directory into the Docker container where Memgraph can access them.
Transfer CSV files into a Docker container
1. Start your Memgraph instance using Docker.
2. Open a new terminal and find the
CONTAINER IDof the Memgraph Docker container:docker ps3. Copy a file from your current directory to the container with the command:
docker cp ./file_to_copy.csv <CONTAINER ID>:/file_to_copy.csvThe file is now inside your Docker container, and you can import it using the
LOAD CSVclause.The following query will create relationships between the people nodes:
LOAD CSV FROM "/path-to/people_relationships.csv" WITH HEADER AS row
MATCH (p1:Person {id: row.first_person})
MATCH (p2:Person {id: row.second_person})
CREATE (p1)-[f:IS_FRIENDS_WITH]->(p2)
SET f.met_in = row.met_in;
This is how the graph should look like in Memgraph after the import:
MATCH p=()-[]-() RETURN p;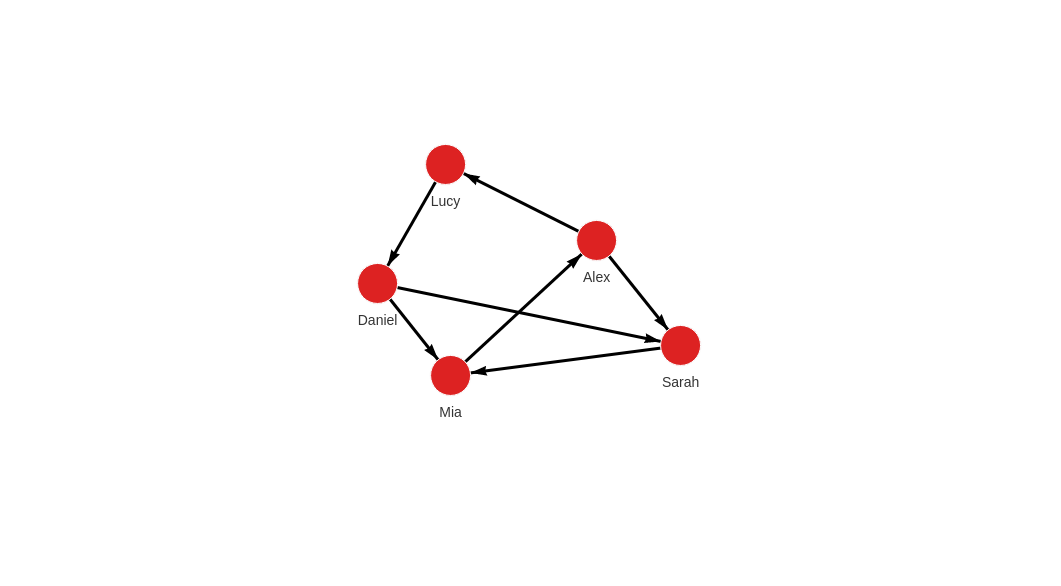
Now move on to the restaurants_nodes.csv file.
Download the
restaurants_nodes.csvfile that holds a list of restaurants people ate at:id,name,menu
200,Mc Donalds,Fries;BigMac;McChicken;Apple Pie
201,KFC,Fried Chicken;Fries;Chicken Bucket
202,Subway,Ham Sandwich;Turkey Sandwich;Foot-long
203,Dominos,Pepperoni Pizza;Double Dish Pizza;Cheese filled CrustCheck the location of the CSV file. If you are working with Docker, copy the files from your local directory into the Docker container where Memgraph can access them.
Transfer CSV files into a Docker container
1. Start your Memgraph instance using Docker.
2. Open a new terminal and find the
CONTAINER IDof the Memgraph Docker container:docker ps3. Copy a file from your current directory to the container with the command:
docker cp ./file_to_copy.csv <CONTAINER ID>:/file_to_copy.csvThe file is now inside your Docker container, and you can import it using the
LOAD CSVclause.The following query will create new nodes for each restaurant:
LOAD CSV FROM "/path-to/restaurants_nodes.csv" WITH HEADER AS row
CREATE (n:Restaurant {id: row.id, name: row.name, menu: row.menu});
This is how the graph should look like in Memgraph after the import:
MATCH (p) RETURN p;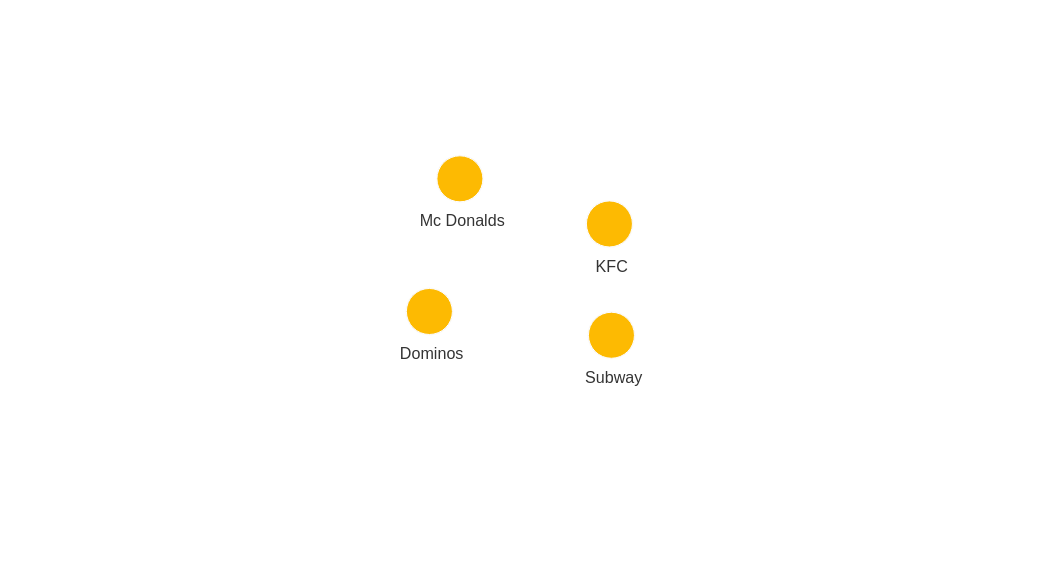
Now move on to the restaurants_relationships.csv file.
Download the
restaurants_relationships.csvfile that contains a list of people and the restaurants they visited:PERSON_ID,REST_ID,liked
100,200,true
103,201,false
104,200,true
101,202,false
101,203,false
101,200,true
102,201,trueCheck the location of the CSV file. If you are working with Docker, copy the files from your local directory into the Docker container where Memgraph can access them.
Transfer CSV files into a Docker container
1. Start your Memgraph instance using Docker.
2. Open a new terminal and find the
CONTAINER IDof the Memgraph Docker container:docker ps3. Copy a file from your current directory to the container with the command:
docker cp ./file_to_copy.csv <CONTAINER ID>:/file_to_copy.csvThe file is now inside your Docker container, and you can import it using the
LOAD CSVclause.The following query will create relationships between people and restaurants where they ate:
LOAD CSV FROM "/path-to/restaurants_relationships.csv" WITH HEADER AS row
MATCH (p1:Person {id: row.PERSON_ID})
MATCH (re:Restaurant {id: row.REST_ID})
CREATE (p1)-[ate:ATE_AT]->(re)
SET ate.liked = ToBoolean(row.liked);
This is how the graph should look like in Memgraph after the import:
MATCH p=()-[]-() RETURN p;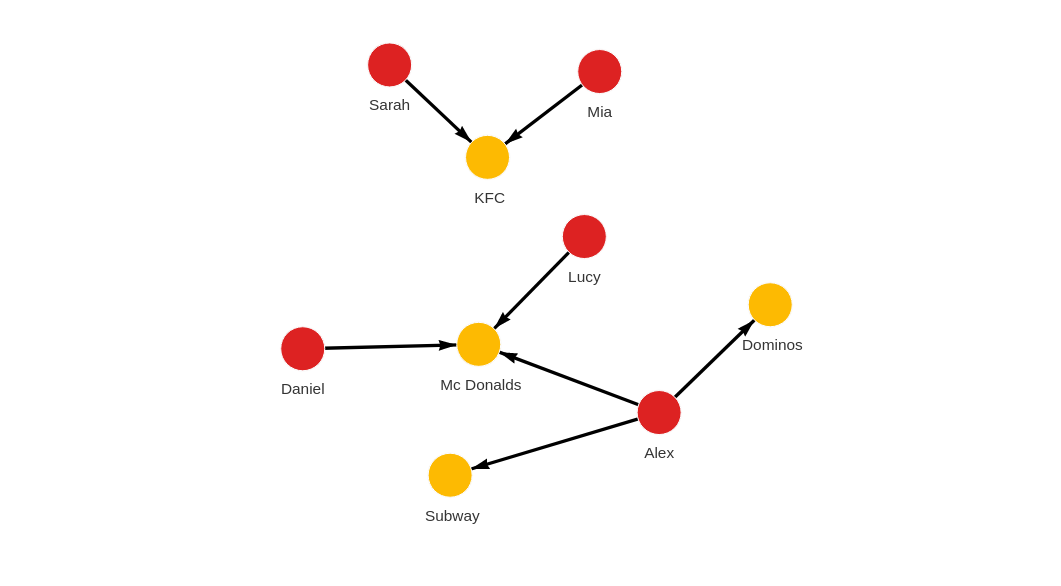
Congratulations! You've imported all the CSV files!