Install MemgraphDB and Memgraph Lab on Windows 10
In this tutorial, you will install both MemgraphDB and Memgraph Lab on Windows 10. You will then test each installation by running a few basic queries to make sure that everything is working correctly.
You can install MemgraphDB and Memgraph Lab as separate components or you can use the Memgraph Platform Docker image. Memgraph Platform contains MemgraphDB, Memgraph Lab, mgconsole and MAGE. It is the recommended installation option, and it isn't part of this tutorial.
If you want to install Memgraph Platform, please follow the Memgraph Platform installation guide.
Memgraph is also available as a Memgraph Cloud solution that requires no installation - be sure to check it out.
MemgraphDB is a native, in-memory graph database built for real-time business-critical applications. Memgraph supports strongly-consistent ACID transactions and uses the Cypher query language for structuring, manipulating, and exploring data.
Memgraph Lab is a lightweight and intuitive Cypher and Bolt compatible integrated development environment (IDE). It's designed to help you import data, develop, debug, and profile database queries and visualize query results.
Prerequisites
For a seamless installation of MemgraphDB and Memgraph Lab on Windows 10, ensure that you have:
- A computer running Windows 10 (64-bit version) with Windows subsystem for Linux
- Administrative rights to your Windows PC and an internet connection.
- Basic knowledge of working with the command line.
Step 1 - Enable Windows Subsystem for Linux
First, you need to enable the Windows subsystem (WSL) for Linux by following the Microsoft instructions.
After you install WSL the next step is to install Ubuntu Linux distribution. To install it do the following:
- Open Windows PowerShell
- Run the
wsl --install -d Ubuntucommand - Enter the username and password for your new Linux user
If everything works properly, you will get the following output:
Enter new UNIX username: james
New password:
Retype new password:
passwd: password updated successfully
Installation successful!
Congratulations! You have successfully installed the Debian distribution of Linux on your Windows machine. You are now ready to install Memgraph.
Step 2 - Installing Memgraph
You must know your exact Ubuntu version so that you can download the right Memgraph package. To find out the version, run the following command in the Ubuntu shell:
lsb_release -d
Your output will look something like this:
Description: Ubuntu 20.04 LTS
Therefore, the Linux distribution is Ubuntu 20.04.
Now you can go to Memgraph's download page and download the installation package for your Linux distribution (in this example, Ubuntu 20.04).
Once the download is complete, open your Ubuntu shell and run the following command to start the installation process:
sudo dpkg -i /path/to/memgraph_<version>.deb
- replace
/path/towith path to where you downloaded your installation package. - replace
_versionwith the version of the package that you are installing (usually the name of the installation package you downloaded).
For example, if user Arthur downloads version 2.1.1-1_amd64 to default Windows
download folder, the file will be located at /mnt/c/Users/Arthur/Downloads,
and the command would be:
sudo dpkg -i /mnt/c/Users/Arthur/Downloads/memgraph_2.1.1-1_amd64.deb
If you see any error related to missing dependency packages, you might have to run the following commands before installing Memgraph:
sudo apt-get update
sudo apt-get -f install
Normally, you would start Memgraph using systemd, but unfortunately, this is
not an option in WSL. You can bypass this inconvenience by using the command
runuser, which allows you to run commands with a substitute user and group ID.
Start the Memgraph server by issuing the following command:
sudo runuser -l memgraph -c '/usr/lib/memgraph/memgraph'
If Memgraph has been installed correctly, you will see something like this:
You are running Memgraph v2.1.1
Awesome! Now you have a running Memgraph instance on your Windows machine.
Step 3 - Installing Memgraph Lab and connecting to Memgraph
Start by downloading Memgraph Lab for Windows.
The downloaded package will be a .exe installer and can be easily run just
like other Windows installers.
Before connecting, ensure that the Memgraph server is running as explained in Step 2. You won't be able to connect if the server is not already running!
Double click on the installer to start the installation process.
Once the installation is completed, Memgraph Lab will launch, and you will be presented with the Home screen. Click Connect now to connect to your Memgraph instance.
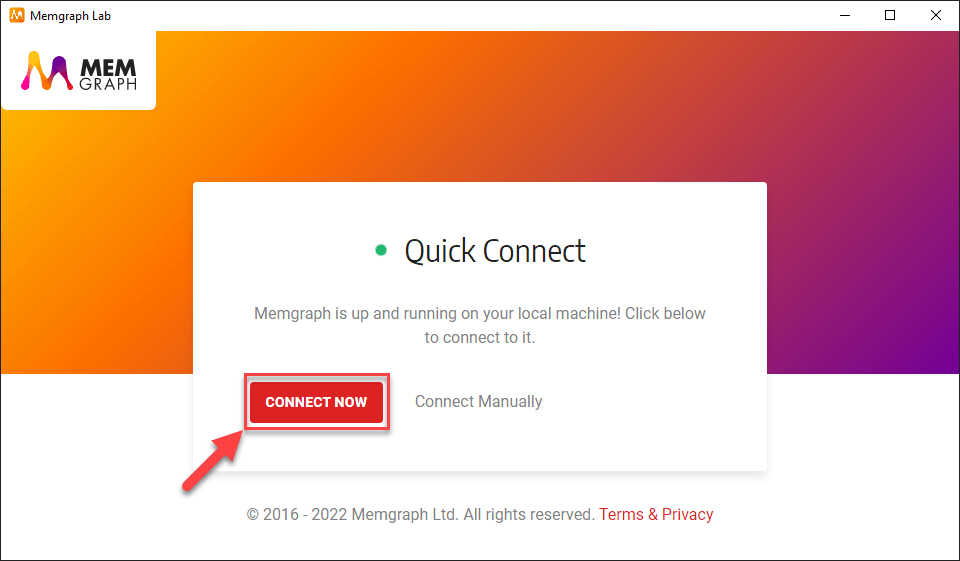
You can also click Connect Manually to connect to Memgraph. Manual connection is usually used when you want to connect to a remote instance of Memgraph, and not a local one. Using the default values of the "Host" and "Port" text fields, and leaving the "Username" and "Password" fields blank, will also connect you to your running Memgraph instance.
Once connected, you'll be presented with Memgraph Lab's user interface.
Now that you have Memgraph Lab installed and connected to Memgraph, you will run a few basic queries to make sure everything works properly.
Step 4 - Testing the Memgraph Lab's connection to Memgraph
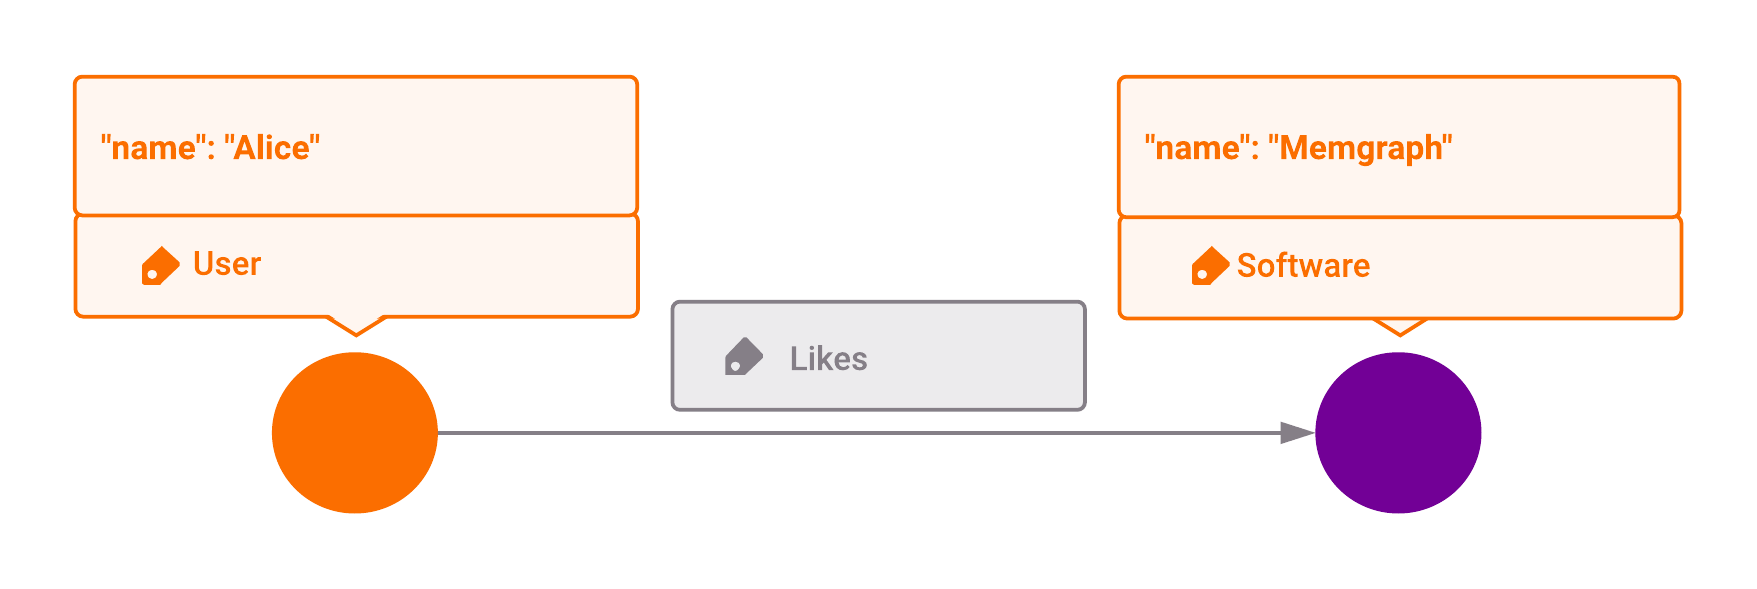
You can test the Memgraph Lab's connection to Memgraph by running your first query. You will use the Cypher query to create a simple graph that has two nodes and one relationship.
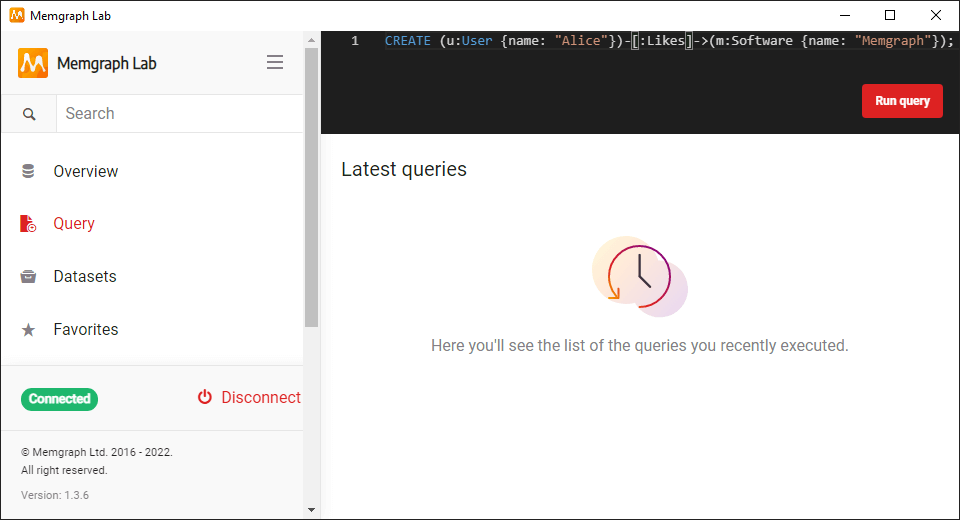
First, click the Query in the sidebar.
Next, enter this first query at the query editor which is located at the top of the screen:
CREATE (u:User {name: "Alice"})-[:Likes]->(m:Software {name: "Memgraph"});The query above creates 2 nodes and a relationship between them.
Lastly, click "Run" or press
Ctrl + Enterto execute the query.
If no error message appeared, that means your query was executed successfully.
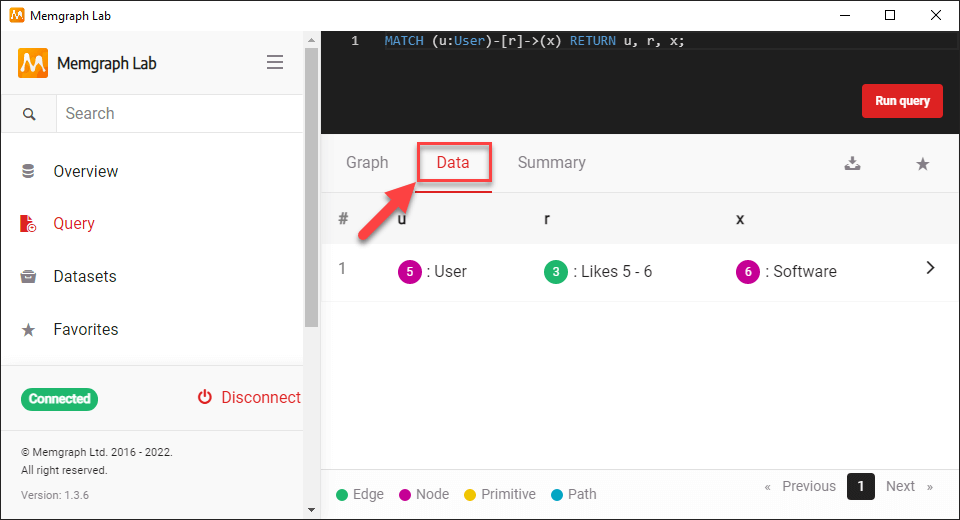
You can retrieve the nodes and relationships you've just created by executing the following Cypher query:
MATCH (u:User)-[r]->(x)
RETURN u, r, x;
On the Data tab your result should look similar to this:
If you switch to the Graph tab you will see something like this:
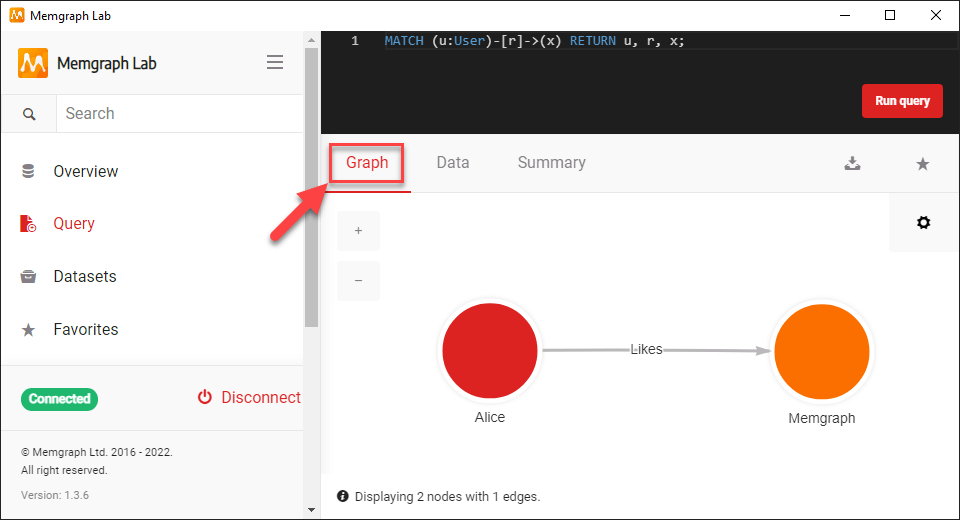
Now you have the Memgraph Lab working correctly on your system. Memgraph Lab's visual presentation of query results is one of its best features.
Where to next?
In this tutorial, you installed MemgraphDB and Memgraph Lab on Windows 10 using Windows Subsystem for Linux. You tested the Memgraph Lab's connection to MemgraphDB by executing Cypher queries.
To learn how to query the database, take a look at the
querying guide or Memgraph
Playground for interactive tutorials.
Visit the Drivers overview
page if you need to connect to the database programmatically.